Before starting the Parallels Pro Control Panel installation, ensure that the server where you are installing Parallels Pro Control Panel 10.3.2 meets all the requirements in the preparation section.
- Log in as the administrator to the server where you are installing Parallels Pro Control Panel 10.3.2 and run the Parallels Pro Control Panel.10.3.2.msi file:
- If you have the Parallels Pro Control Panel 10.3.2 CD, insert the CD in the server's CD-ROM drive, browse to the ensimpro directory on the CD and run Parallels Pro Control Panel.10.3.2.msi.
- If you do not have the Parallels Pro Control Panel 10.3.2 CD, download the Parallels Pro Control Panel installation files from the location given in the purchase order email from Parallels. Browse to the directory, where you have stored the Parallels Pro Control Panel installation files, and run Parallels Pro Control Panel.10.3.2.msi.
The Welcome window opens.
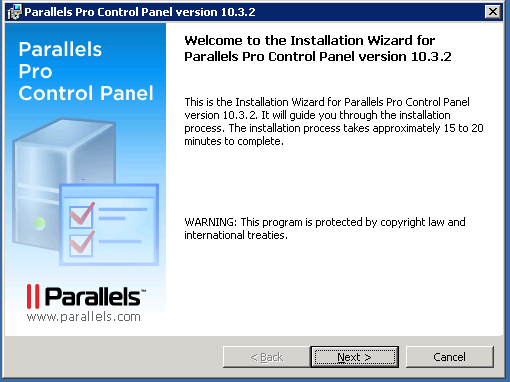
Note: The installation process brings up a number of windows. These windows contain the following buttons:
Back – Opens the previous installation window. You can use this button to change or view any information entered in the previous window.
Next – Opens the next installation window.
Cancel – Cancels the installation. For information about the effects of canceling the installation, see Canceling the Parallels Pro Control Panel 10.3.2 Installation.
- Click Next . The License Agreement window opens.
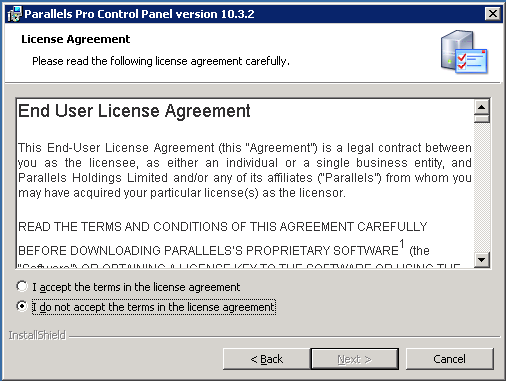
- Read the contents of the License Agreement window carefully.
- When you buy Parallels Pro Control Panel from the Parallels Pro Storefront, the 25-character license key for using Parallels Pro Control Panel is emailed to you. In the License Key Dialog window, type this 25-character license key, then click Next.

- In the Customer Information window, enter your name, company name, and email address in the text boxes User Name, Organization, and Contact Email respectively.
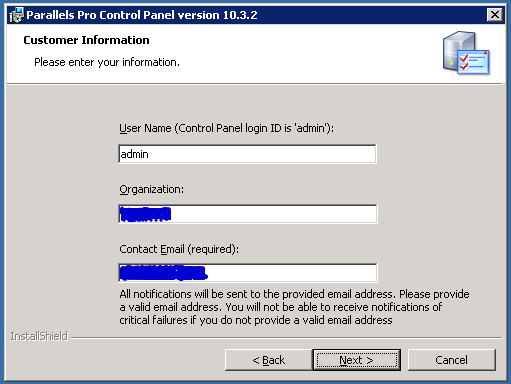
Note: All three text boxes are mandatory. The email address entered in the Contact Email text box is used by Parallels Pro Control Panel 10.3.2 for email notifications.
- Click Next.
The Destination Folder window opens.
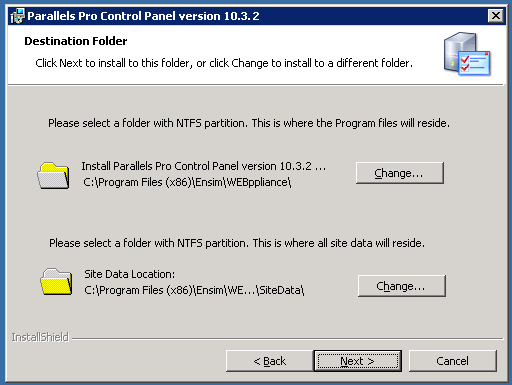
- In the Destination Folder window, select the location on the server where the Parallels Pro Control Panel 10.3.2 program files will be installed. This folder must be on an NTFS partition or drive. The default location is
C:\Program Files\Ensim\WEBppliance. Click Change to select a new folder.In the Site Data location section, select the location on the server where the site data files will reside. This can be a folder on any NTFS drive. The default location is C:\Program Files\Ensim\WEBppliance\SiteData. Click Change to select a new folder. This location is also used to store the server administrator's and reseller administrator's customization data.
Important: Do not remove this directory even if you change the site data location later from the Parallels Pro Control Panel 10.3.2 control panel.
- Click Next to proceed with the installation.
The Administrator Password window opens.

- In the Administrator Password window, enter a password for the default control panel administrator (called admin) in the Password text box. Ensure that the password contains at least six characters.
Important: If you have enabled complex password policy settings on the Parallels Pro Control Panel server, ensure that the password you specify meets the complexity requirements; otherwise the installation will fail.
Use the login name admin and the password you enter in the Administrator Password window to log in as the server administrator later. For more information about logging in as the server administrator, see Logging in as the server administrator.
- Enter the password again in the Re-type Password text box and click Next.
The Network Settings window opens.

- In the Network Settings window, enter the network settings of the server where you want to install Parallels Pro Control Panel 10.3.2.
Enter or select values in the following fields.
- IP address – From the drop-down list, select an IP address from the list of available IP addresses, for example, 10.72.62.1. This IP address is assigned to all name-based sites.
- Fully qualified domain name – Enter the fully qualified domain name (FQDN) of the server, for example, servername.example.net. The FQDN consists of a host and domain name. If your server is not a part of any domain, you can enter only the host name in this text box. The FQDN must resolve to the above IP address through the Internet (and not only through your LAN or intranet).
- Click Next to proceed with the installation.
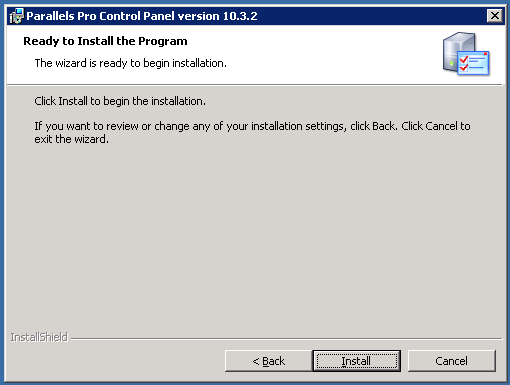
The Ready to Install window opens.

- In the Ready to Install window, click Install to start the installation.
To review any of the settings, click Back. - When the Parallels Pro Control Panel 10.3.2 installation is complete, the Installation Completed window opens. Select from the following two options and click Finish to complete the installation.